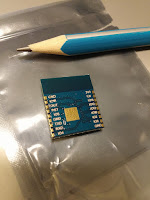
- In this this experiment I follow the esp8266 repository. As the preparation below,
- Install Arduino 1.6.5 or higher from the Arduino website.
- Start Arduino and open Preferences window.
- Enter http://arduino.esp8266.com/stable/package_esp8266com_index.json into Additional Board Manager URLs field.
- You can add multiple URLs, separating them with commas.
- Open Boards Manager from Tools > Board menu and install esp8266 platform (and don't forget to select your ESP8266 board from Tools > Board menu after installation).
รายละเอียดอื่นเกี่ยวกับคุณสมบัติ esp8266 สามารถหาได้จาก docs
An example code to connect to a network using DHCP.
-------------------------------------------------------------------------------
#include <ESP8266WiFi.h>
const char* ssid = "networkID";//enter your network ssid
const char* password = "password"; //password of the network
void setup(){
Serial.begin(115200); //an esp8266 uses 115200 bit rate by default
delay(100); //some small delay the get the serial connection ready
//attempting to connect the network and aquiring IP from a DHCP server
Serial.print("Connecting to netwok");
Serial.println(ssid);
WiFi.begin(ssid, password);
//waiting for connection
while (WiFi.status() != WL_CONNECTED){
delay(500);
Serial.print(".");
}
//show connection details
Serial.println("Connected IP address: ");
Serial.println(WiFi.localIP());
}
void loop() {}
----------------------------------------------------------------------------------

No comments:
Post a Comment